Encountering the sorry you are not allowed to access this page WordPress error creates immediate stress for any website owner. Although you own the domain and pay for the hosting, your website currently blocks you from the dashboard.
Consequently, you might feel like a hacker attacked you or stripped you of your administrative rights. Unlike a standard “404 Not Found” error, this message feels personal. It tells you that the server knows who you are; however, it refuses to let you in.
The good news involves the nature of the problem. Effectively, this error represents a simple permissions lockdown. It typically happens when a mismatch exists between your user role and the capability required to view the page.
🚀 Locked Out and Panicking? If you cannot access your dashboard and feel uncomfortable editing databases or FTP files, Click here to order our Emergency Fix Service. We can restore your administrator access and resolve this permission error within one hour.
In this extensive guide, we will break down the technical causes of this error. Furthermore, we will provide you with 5 proven, step-by-step methods to regain control of your website.
What Causes the Sorry You Are Not Allowed to Access This Page WordPress Error?
Before we dive into the solutions, you must understand why this happens. WordPress uses a sophisticated “User Role and Capability” system. For instance, an Administrator can do everything, whereas a Subscriber can only manage their profile.
A failed security check triggers the sorry you are not allowed to access this page WordPress error. Specifically, here are the most common culprits:
-
Plugin Conflicts (The #1 Cause): A security plugin or a membership plugin might have accidentally altered your user role.
-
Corrupt .htaccess File: This configuration file controls how your server routes traffic.
-
Database Prefix Changes: If you recently migrated your site or changed your database prefix (e.g., from
wp_tosite_), your user permissions might still look for the old prefix. -
Incorrect File Permissions: Your server enforces strict rules about who can read or write files.
-
PHP Version Incompatibility: Upgrading your server’s PHP version can sometimes break older code in your theme.
We will start with the easiest fixes. Subsequently, we will move to the advanced database solutions.
Method 1: Restore Backup to Fix Sorry You Are Not Allowed to Access This Page WordPress Error
Before you start dissecting your website’s code, checking your backups offers the smartest first step. If the sorry you are not allowed to access this page WordPress error appeared immediately after you updated a plugin or installed a new theme, restoring a version of your site from 24 hours ago provides the fastest solution.
How to Restore:
-
First, log in to your Hosting Control Panel (cPanel, hPanel, or Managed WP Dashboard).
-
Next, locate the Backups or Restore section.
-
Then, select a restore point from a date before the error appeared.
-
Finally, restore both the Database and the Files.
However, if you do not have a backup, or if restoring fails to fix the issue, proceed to Method 2.
Method 2: Disable Plugins to Fix Sorry You Are Not Allowed to Access This Page WordPress Error
Since you cannot access your dashboard to deactivate plugins, you must perform this task manually using FTP (File Transfer Protocol).
Plugins—especially security plugins like Wordfence or iThemes—notoriously cause the sorry you are not allowed to access this page WordPress error. They often erroneously flag your login attempt as malicious.
Step-by-Step Guide:
-
Connect to Your Server: Use an FTP client like FileZilla and enter your FTP credentials.
-
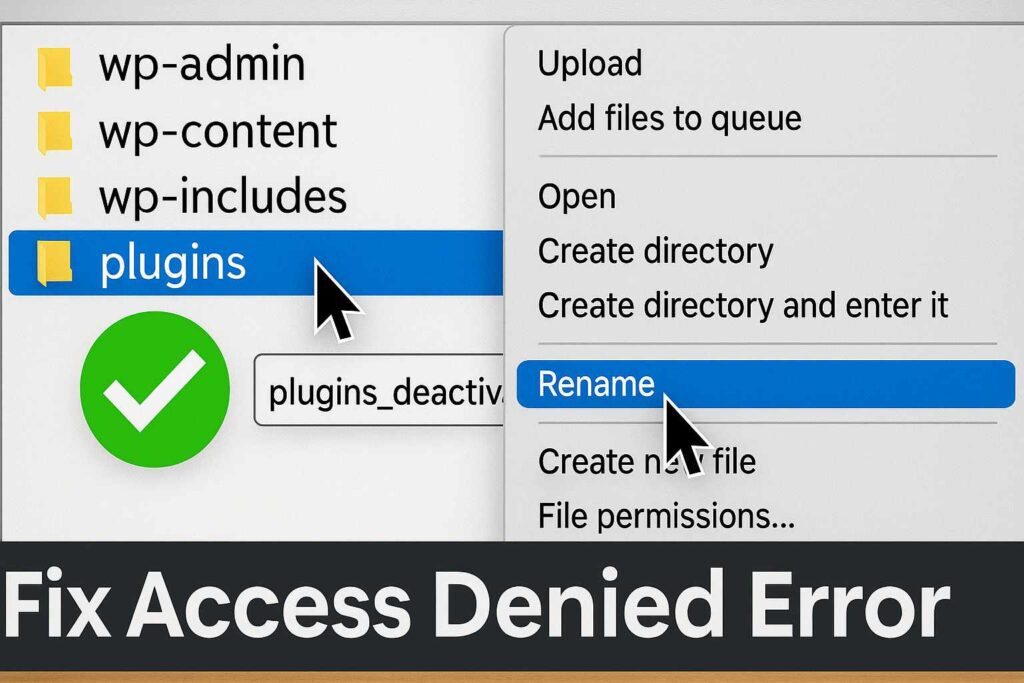
Navigate to Plugins: Go to
public_html>wp-content>plugins. -
Rename the Folder: Find the folder of the plugin you suspect causes the issue. Right-click it and rename it to something like
plugin-name-deactivated.-
Pro Tip: To disable all plugins at once, rename the main
pluginsfolder toplugins_old.
-
-
Check Your Site: Try logging into your WordPress dashboard (
/wp-admin/).
If you can log in successfully, one of those plugins caused the error.
-
First, rename the folder back to
pluginsif you disabled all of them. -
Next, go to your dashboard (plugins will now be deactivated).
-
Finally, activate them one by one until the error returns to identify the culprit.
Method 3: Regenerate .htaccess for Sorry You Are Not Allowed to Access This Page WordPress Fix
Your .htaccess file acts as the gatekeeper of your site. If the file contains a rule that says “Block access to wp-admin,” the server locks you out immediately. Therefore, regenerating this file offers a quick way to rule out server configuration issues.
Step 1: Locate the File
Connect via FTP or use your Hosting File Manager. Navigate to the public_html folder. Look for .htaccess.
-
Note: If you don’t see it, make sure you enable “Show Hidden Files” in your settings.
Step 2: Disable the Current File
Right-click the .htaccess file and rename it to .htaccess_corrupt. This action effectively turns the file off.
Step 3: Test Login
Try to log in to your dashboard. If the sorry you are not allowed to access this page WordPress error disappears, you have found the problem.
Step 4: Create a Fresh File
Once logged in, go to Settings > Permalinks and simply click Save Changes. WordPress automatically generates a fresh, clean .htaccess file for you.
Method 4: Fix Database Permissions for Sorry You Are Not Allowed to Access This Page WordPress Error
This method serves as the most advanced and technical solution. However, it also acts as the definitive fix if the issue stems from a database migration or a hacked site.
Sometimes, the link between your User ID and your “Administrator” capabilities breaks in the database. This frequent issue usually occurs if you changed your database table prefix but failed to update the user meta permissions.
You will need to access phpMyAdmin via your hosting control panel.
Step 1: Find Your User Role in the Database
-
Start by opening phpMyAdmin and clicking on your website’s database name.
-
Next, scroll down until you find the table named
wp_users(oryourprefix_users). -
Inside that table, locate your username or email address to find your ID number (usually “1” for the main admin).
Step 2: Check User Meta Capabilities
-
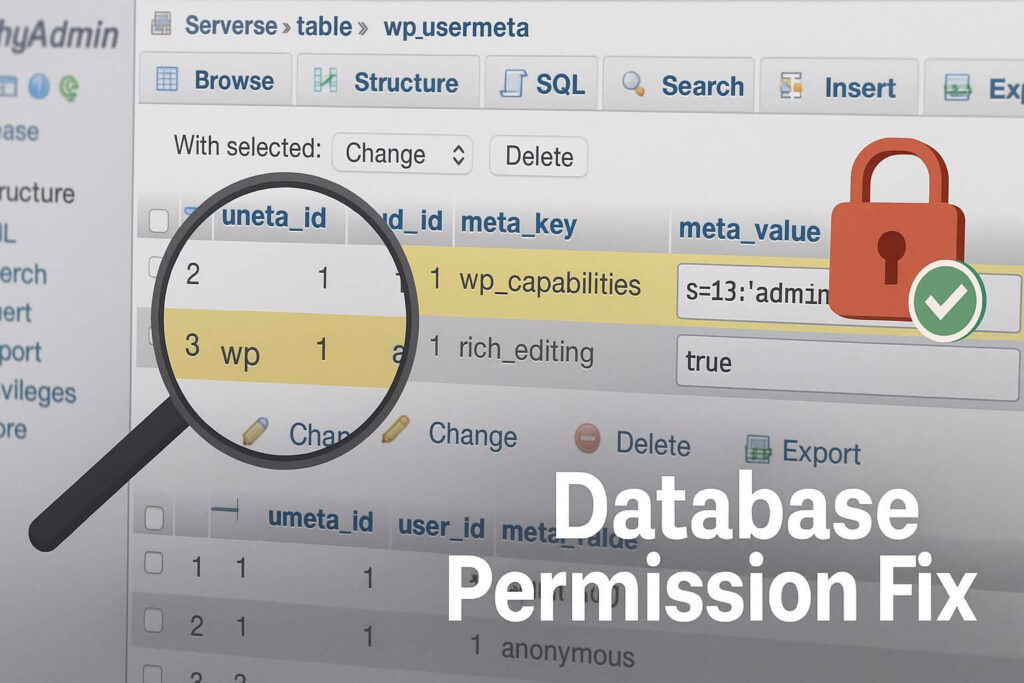
After finding your ID, switch to the table named
wp_usermeta(oryourprefix_usermeta). -
Use the “Search” or “Filter” function to filter for
user_idmatching your ID number. -
Specifically, look for a row in the
meta_keycolumn namedwp_capabilities.-
Crucial Check: Did you change your database prefix to something like
site_? If so, this Key should readsite_capabilities, NOTwp_capabilities. A mismatch here causes the sorry you are not allowed to access this page WordPress error.
-
Step 3: Repair the Capabilities
Assuming the prefix matches, verify the code inside meta_value. For an Administrator, the correct value should look like this:
a:1:{s:13:"administrator";b:1;}
Should the code look different or missing, click Edit and paste the specific code above into the field. Finally, click Go to save your changes.
This process manually forces the database to recognize you as an Administrator again, essentially bypassing the permission lock.
Method 5: Check File Permissions to Resolve Sorry You Are Not Allowed to Access This Page WordPress Error
Strict file permissions stop WordPress from executing the scripts needed to log you in. Consequently, you must verify these settings to ensure they are correct.
The Correct Standard Permissions:
-
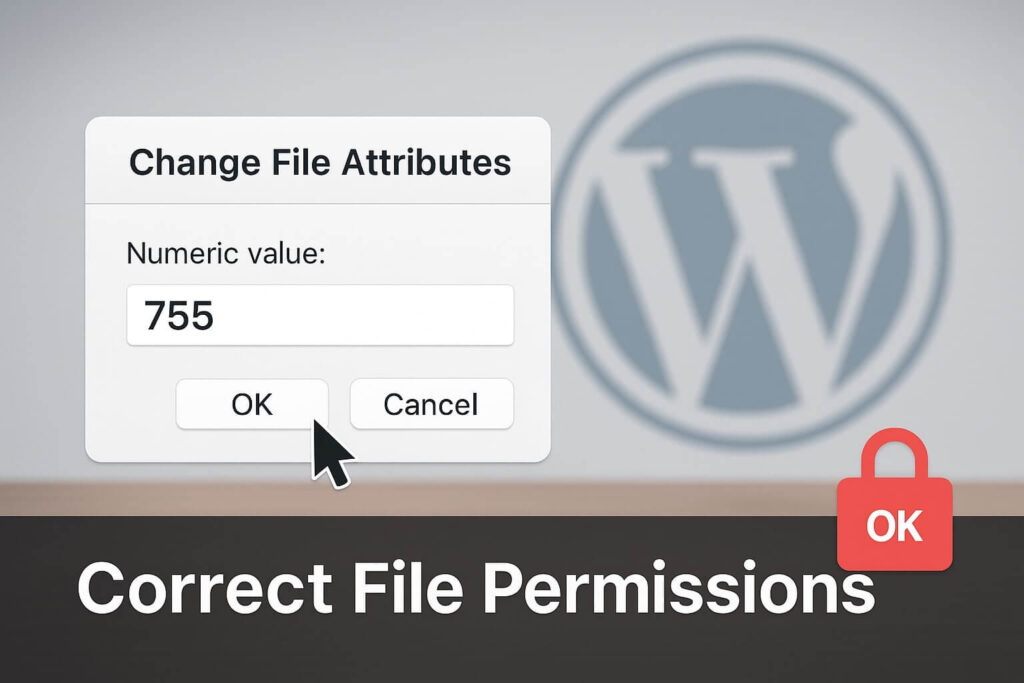
Folders: Set these to 755.
-
Files: Set these to 644.
How to Check via FTP:
-
Open FileZilla and navigate to
wp-admin. -
Right-click the
wp-adminfolder and select File permissions. -
Ensure the numeric value reads 755.
-
Check the box “Recurse into subdirectories” and select “Apply to directories only.”
-
Click OK.
Next, perform the same action for files:
-
Enter the
wp-adminfolder. -
Select all files (Ctrl+A).
-
Right-click > File permissions.
-
Set the value to 644.
-
Click OK.
If you previously set permissions to something confusing like 000 or 777 (insecure), resetting them often resolves the access error.
Conclusion on the Sorry You Are Not Allowed to Access This Page WordPress Error
Being locked out of your own site is terrifying. However, it almost always represents a logic error, not a permanent deletion of your account. The system simply “forgot” that you are the boss.
By systematically checking plugins, regenerating your .htaccess file, and verifying your database user roles, you remind WordPress who is in charge.
Summary of Fixes:
-
Restore Backup: Offers the fastest undo button.
-
Disable Plugins: Removes conflicts quickly.
-
Reset .htaccess: Fixes server routing issues.
-
Database Fix: Restores Administrator capabilities manually.
-
File Permissions: Ensures the server allows script execution.
Still Locked Out? If you have tried all 5 methods and still see the white screen of death, the issue might stem from a deeper server configuration or a malware infection. 👉 Contact Us Here for a security audit, or Order our Emergency Fix Service to get back into your site today.