If you have realized that your site is stuck in maintenance mode WordPress after clicking “Update,” do not panic. You likely clicked to update a few plugins, waited for the process to finish, and suddenly faced a plain white screen with the message: “Briefly unavailable for scheduled maintenance. Check back in a minute.”
You wait a minute. Then five minutes. Then an hour. Unfortunately, the message remains, and you are completely locked out of your dashboard.
This error creates panic because it completely blocks both you (the administrator) and your visitors. Unlike a “404 error” where the rest of the site works, this specific glitch creates a full blockade.
The good news involves the simplicity of the fix. Your site did not break, nor did you lose your data. The system simply “forgot” to turn off the maintenance switch.
🚀 Need this fixed instantly? If you feel uncomfortable deleting server files or using FTP, Click here to order our Quick Fix Service. We will resolve this maintenance lockout and get your site back online within one hour.
In this extensive guide, we will explain exactly why this happens. Furthermore, we will provide you with 3 proven methods to remove the lock and prevent your site from getting stuck in maintenance mode WordPress again.
Why You Get Stuck in Maintenance Mode WordPress
To fix the issue, you must first understand the mechanics behind the updates. Why exactly does this freeze happen in the first place?
When you update a plugin, theme, or the WordPress core, the system performs a sequence of automated tasks:
-
First, it downloads the update files.
-
Second, it puts your site into “Maintenance Mode” to prevent visitors from seeing a broken site while files are being swapped.
-
Third, it installs the new files.
-
Finally, it disables Maintenance Mode.
To activate this mode, the system creates a temporary file in your root folder named .maintenance. Usually, this file exists for only a few seconds.
However, if the update process gets interrupted—perhaps your server timed out, you closed the browser tab too early, or the hosting memory limit was reached—the script stops. Consequently, the system never gets to Step 4. The .maintenance file remains on the server, and your site stays locked indefinitely.
Method 1: Delete File to Fix Stuck in Maintenance Mode WordPress
Since the dashboard is inaccessible, you cannot fix this from inside the admin panel. You must access your server files directly. This method represents the most reliable way to fix a site stuck in maintenance mode WordPress.
You can use an FTP client (like FileZilla) or the File Manager provided by your hosting control panel (cPanel).
Step 1: Connect to Server to Fix Maintenance Mode
First, open your FTP client or File Manager. Enter your hostname, username, and password. If you do not know these details, check the welcome email from your hosting provider or contact their support.
Step 2: Locate the Root Directory for Maintenance Mode Fix
Next, navigate to the public_html folder. This folder typically serves as the root directory for your website. You should see folders like wp-admin, wp-content, and wp-includes.
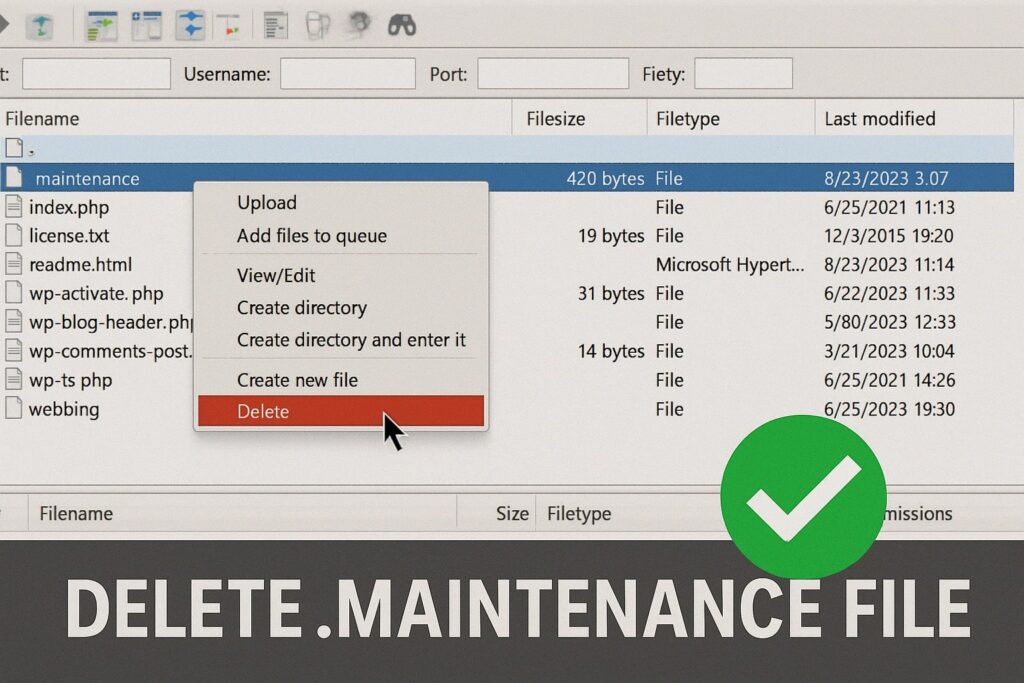
Step 3: Find the File Causing Maintenance Mode
Now, look for a file named .maintenance.
-
Note: The dot at the beginning of the filename indicates a hidden file. If you do not see it, ensure your File Manager settings have “Show Hidden Files” enabled.
Step 4: Delete File to Unstick Maintenance Mode
Finally, right-click on the .maintenance file and select Delete.
Once the file disappears, clear your browser cache and refresh your website. The error should vanish, and your site will load normally. You have successfully resolved the maintenance lockout.
Method 2: Fix Stuck in Maintenance Mode WordPress via SSH
If you possess technical skills or manage a VPS (Virtual Private Server), you might prefer using the command line. This method helps you fix the issue faster than clicking through FTP folders.
Step 1: Connect via SSH
Open your terminal (Mac/Linux) or PuTTY (Windows). Connect to your server using: ssh username@your-server-ip
Step 2: Navigate to Root to Fix Maintenance Mode
Use the cd command to move to your website’s folder: cd /var/www/html/public_html (Note: Your path may vary depending on your host).
Step 3: Remove the Stuck Maintenance File
Type the following command to delete the file causing the stuck in maintenance mode WordPress error: rm .maintenance
Step 4: Verify Maintenance Mode is Gone
Type ls -a to list all files and confirm that .maintenance is gone. Your site should now be live.
Method 3: Fix “Missing File” When Stuck in Maintenance Mode WordPress
Sometimes, you might feel locked out, yet when you check your server, the .maintenance file does not exist.
This scenario is confusing. However, it usually points to a plugin that handles maintenance mode internally, or a theme that has not finished an update script.
Check Plugins Causing Maintenance Mode Stuck Issue
Did you install a “Coming Soon” or “Under Construction” plugin recently? These plugins mimic the maintenance error.
-
Navigate to
wp-content/plugins/via FTP. -
Rename the maintenance plugin folder (e.g.,
seedprod-coming-soontoseedprod-coming-soon_disabled). -
Check your site to see if the blockade is gone.
Check wp-activate.php for Maintenance Glitch
In very rare cases, the wp-activate.php file gets corrupted during a core update. If deleting the .maintenance file didn’t work, re-uploading a fresh copy of wp-activate.php from the official WordPress.org zip file can sometimes fix persistent maintenance loops.
How to Prevent Being Stuck in Maintenance Mode WordPress
While fixing the error is easy, preventing it saves you time and stress. A site usually gets locked because of a resource issue or user action.
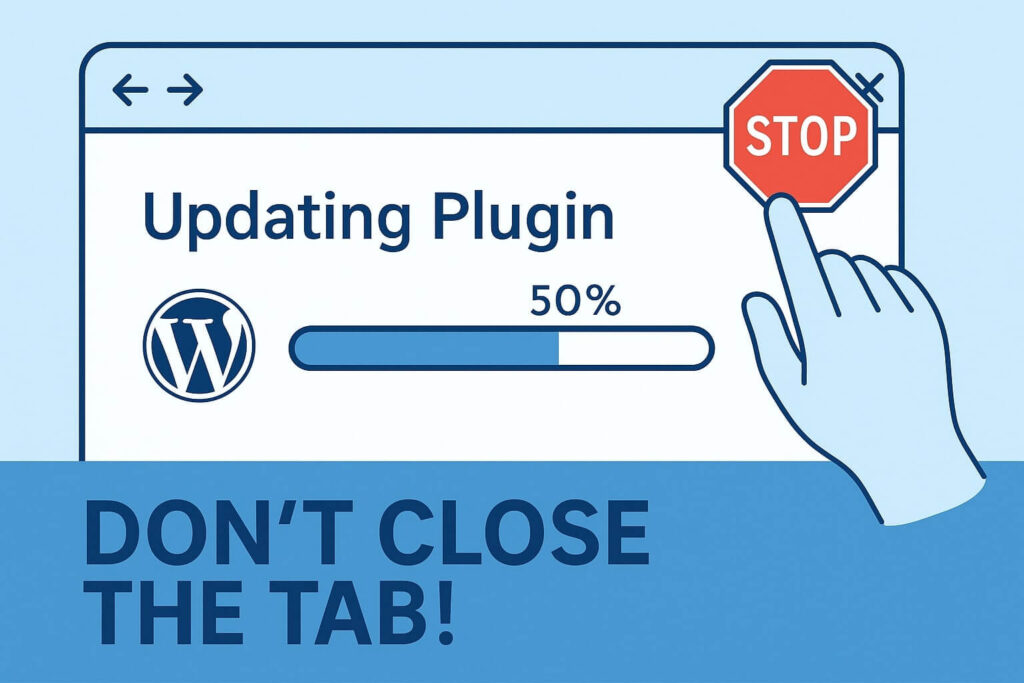
1. Prevent Getting Stuck: Do Not Close the Tab
When updating plugins, never close your browser tab or navigate away until the “Update Complete” message appears. If you leave mid-update, the script dies, and you will trigger the error.
2. Prevent Getting Stuck: Update Plugins Individually
Clicking “Update All” on 20 plugins at once puts a massive load on your server. If your hosting plan is modest, the server will time out. Therefore, update plugins one by one or in small batches of 3-5 to avoid this issue.
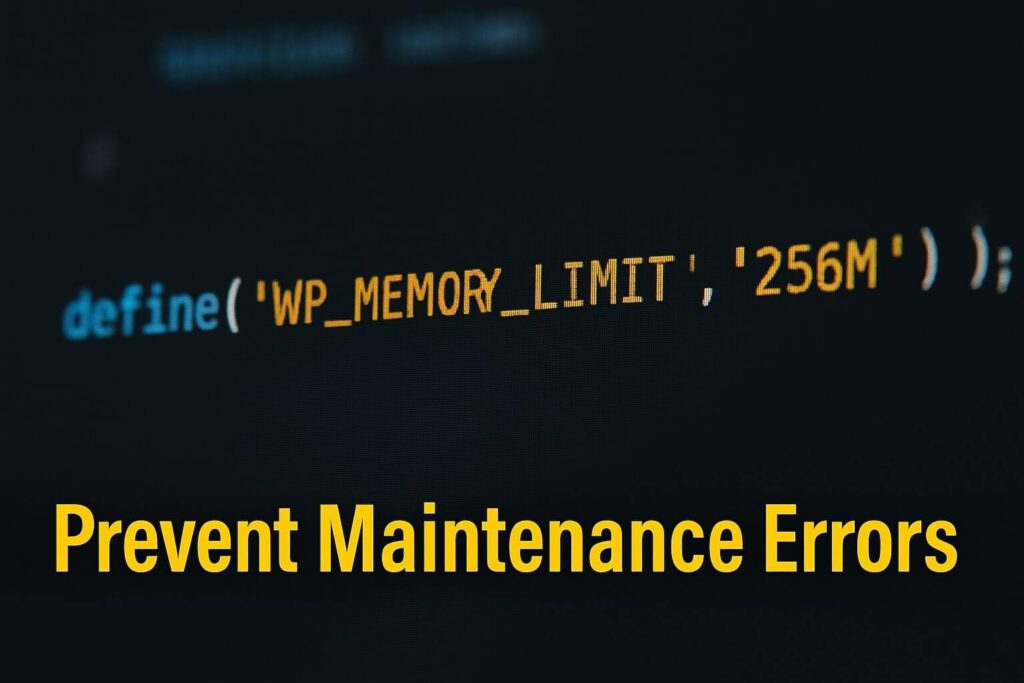
3. Prevent Getting Stuck: Increase Server Memory
If you frequently get stuck in maintenance mode WordPress, your server likely lacks the RAM to handle the update process. Consider increasing your PHP memory limit.
-
Action: Add
define( 'WP_MEMORY_LIMIT', '256M' );to yourwp-config.phpfile.
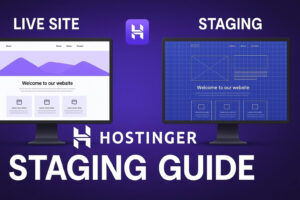
4. Prevent Getting Stuck: Use a Staging Site
For major updates (like WooCommerce or WordPress Core), always test on a staging site first. This ensures that if the update fails, your live visitors remain unaffected.
Bonus: Customizing Messages When Stuck in Maintenance Mode WordPress
The default “Briefly unavailable” text looks ugly and scary to visitors. Since maintenance is a necessary part of website ownership, why not make it look professional?
Instead of relying on the default system, you can use plugins to create a branded maintenance page.
Recommended Plugins:
-
SeedProd: Allows you to build beautiful “Coming Soon” pages with email capture forms.
-
WP Maintenance Mode: A lightweight option with countdown timers.
By using these tools, you avoid the default error screen entirely. Even if an update fails in the background, your visitors see a professional landing page instead of the white screen of death.
Conclusion on Being Stuck in Maintenance Mode WordPress
The “Briefly unavailable for scheduled maintenance” message looks like a critical failure. However, it serves as a safety feature that simply got stuck.
By manually deleting the .maintenance file via FTP or File Manager, you tell the system, “The update is done, let people back in.”
Summary of Steps:
-
Connect via FTP or cPanel.
-
Locate the
.maintenancefile inpublic_html. -
Delete the file.
-
Refresh your website to fix the stuck in maintenance mode WordPress error.
Still Seeing the Error? If you deleted the file but still cannot access your site, or if you are uncomfortable touching server files: 👉 Contact Us Here for professional assistance, or Order our Emergency Fix Service to fix your website issue immediately.