You are testing your website to ensure everything works perfectly, but when you click “Submit” on your inquiry page, you face the dreaded contact form 7 red border error. Instead of a green success message, a box with a thick red outline appears, displaying the message: “There was an error trying to send your message. Please try again later.”
This moment causes immediate panic for business owners. A contact form is your primary line of communication with potential leads. If it fails, you are actively losing customers every second the issue persists.
Unlike the orange border (which indicates spam) or the yellow border (which indicates a validation error like a missing field), the red border is critical. It means the plugin attempted to send the email, but the server rejected it.
🚀 Need this fixed instantly? If you are uncomfortable configuring SMTP servers or API keys, Click here to order our Quick Fix Service. We will resolve the contact form 7 red border error and ensure your emails hit the inbox within one hour.
In this extensive guide, we will break down the technical reasons behind this failure. Furthermore, we will provide you with 5 proven, step-by-step methods to fix the mail server issues and restore your communication channels.
[Image: contact-form-7-red-border-error-thumbnail.jpg] Alt Text: Computer screen showing the Contact Form 7 red border error message during submission.
Understanding the Contact Form 7 Red Border Error
To fix the issue, you must distinguish between the different error types Contact Form 7 (CF7) uses. The color of the border tells you exactly where the problem lies.
Yellow/Orange Border: Validation error. The user filled out a field incorrectly (e.g., entered “text” in a “date” field) or a required field is empty.
Orange Border: Spam protection. Akismet or reCAPTCHA flagged the submission as spam.
Red Border: Mail sending failure. The form worked, but the WordPress
wp_mail()function failed to hand over the email to the receiving server.
The contact form 7 red border error specifically indicates a server-side failure. This usually happens because your hosting provider does not allow PHP mail sending, or your authentication details are missing.
Common Triggers
Missing SMTP Configuration: This is the #1 cause. Your server is trying to send email “anonymously,” and major email providers (Gmail, Outlook) block it instantly.
Broken reCAPTCHA Keys: You are using reCAPTCHA v3, but the keys are invalid or conflicting.
Server Restrictions: Your hosting provider has disabled the default
php mail()function to prevent spam.Plugin Conflicts: Another caching or security plugin is blocking the submission script.
We will address these issues systematically, starting with the most effective solution: SMTP.
Method 1: Set Up SMTP to Fix Contact Form 7 Red Border Error
In 90% of cases, the contact form 7 red border error happens because you are relying on the default WordPress email function. Most modern hosting providers block this function to stop spammers from using their servers to send junk mail.
To fix this, you must “authenticate” your emails using SMTP (Simple Mail Transfer Protocol). This tells the server, “Hi, I am a legitimate user, here is my password, please send this email.”
Step 1: Install an SMTP Plugin
You do not need to code this manually. We recommend using a free plugin like WP Mail SMTP.
Go to Plugins > Add New.
Search for “WP Mail SMTP”.
Install and Activate it.
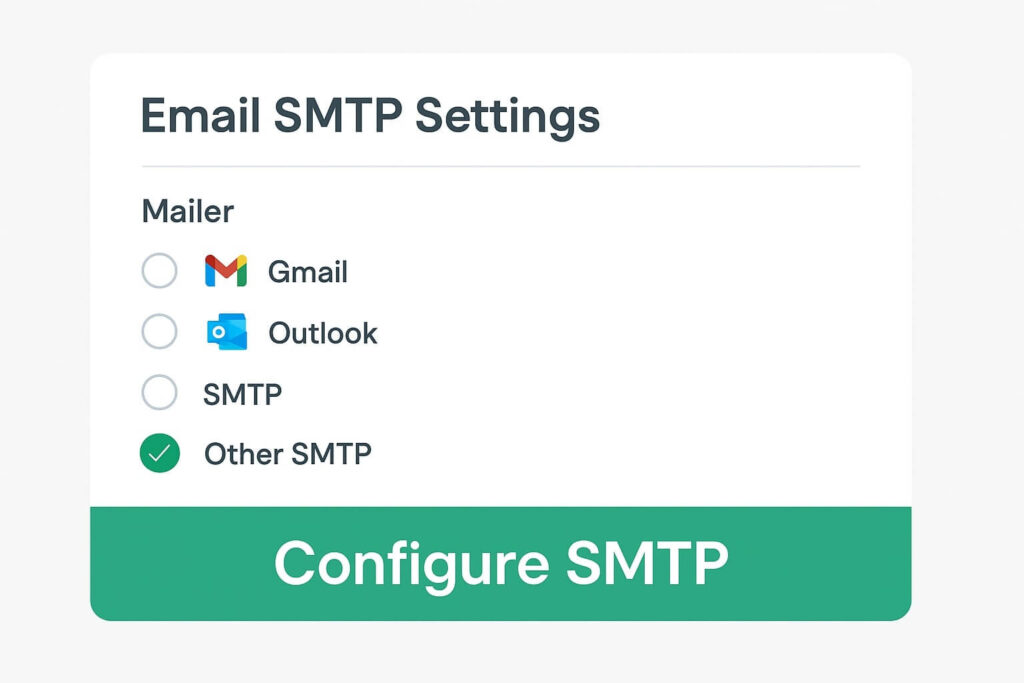
Step 2: Configure the Mailer
Navigate to WP Mail SMTP > Settings. You will see a list of mailers.
Recommended: If you use Gmail/Google Workspace, select “Google”. If you use Outlook, select “Microsoft”.
Generic: If you use cPanel email (e.g., info@yourdomain.com), select “Other SMTP”.
Step 3: Enter Credentials
If you selected “Other SMTP,” enter the details provided by your host:
SMTP Host: (e.g., https://www.google.com/search?q=mail.yourdomain.com)
Encryption: TLS or SSL.
SMTP Port: Usually 587 or 465.
Username/Password: Your actual email address and password.
Step 4: Send a Test Email
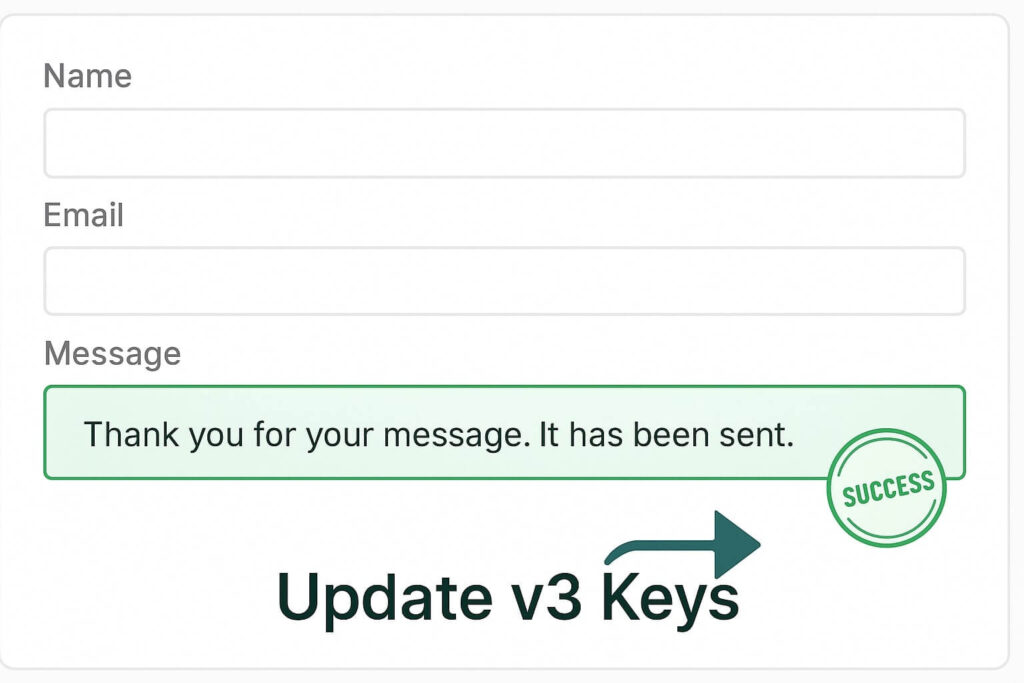
Go to the Email Test tab in the plugin and send a test email to yourself. If it delivers successfully, go back to your contact page. The contact form 7 red border error should be gone, replaced by a green success message.
Method 2: Fix reCAPTCHA to Solve Contact Form 7 Red Border Erro
If you have SMTP set up but still face the error, the culprit is often Google reCAPTCHA. Contact Form 7 integrates tightly with reCAPTCHA v3. If the API keys are wrong, or if the “score” threshold is too strict, CF7 will block the submission.
Confusingly, CF7 sometimes displays the contact form 7 red border error instead of the orange spam border when reCAPTCHA fails technically (connection error) rather than logically (spam detection).
Step 1: Check Your Integration
Go to Contact > Integration in your WordPress dashboard.
Look for the reCAPTCHA box.
Click Setup Integration (or “Remove Integration” if already set, then re-add it).
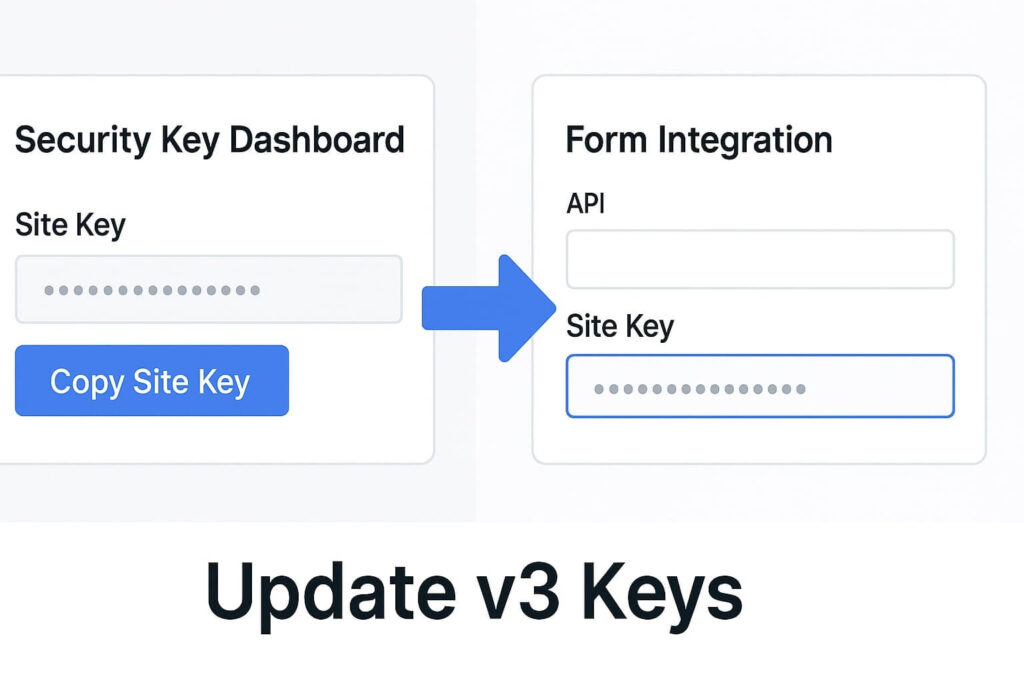
Step 2: Generate New Keys
Go to the Google reCAPTCHA Admin Console.
Register a new site.
Crucial: Ensure you select reCAPTCHA v3. Contact Form 7 does not support v2 natively anymore.
Add your domain.
Copy the new Site Key and Secret Key.
Step 3: Update WordPress
Paste the new keys into Contact > Integration.
Step 4: Test Without Cache
Clear your browser cache and try the form. If the keys were mismatched, this will resolve the contact form 7 red border error immediately.
Method 3: Check Spam Settings for Contact Form 7 Red Border Error
Sometimes, the error is a false positive caused by over-aggressive spam filtering on your server configuration. If you use a tool like Akismet or a firewall, it might interrupt the mail sending process, resulting in the generic red error.
Step 1: Temporarily Disable Spam Protection
If you have Akismet installed:
Go to Plugins.
Deactivate Akismet Anti-Spam.
Test your form.
If the contact form 7 red border error disappears, Akismet was falsely flagging your test submissions. You can reactivate it and adjust its strictness level.
Step 2: Check “From” Headers
Contact Form 7 requires a valid “From” address in the Mail tab settings.
Go to Contact > Contact Forms.
Edit your form and click the Mail tab.
Look at the From field.
Rule: This email address MUST belong to your domain (e.g.,
wordpress@yourdomain.com).Mistake: Do not use
[your-email](the user’s email) in the “From” field. This is called “spoofing,” and servers reject it instantly, causing the red border.
Instead, use [your-email] in the Additional Headers field as: Reply-To: [your-email].
Method 4: Server Limits Causing Contact Form 7 Red Border Error
In rare cases, the issue is not configuration, but capacity. If your contact form includes file uploads (like a CV or image), you might be hitting server limits.
If a user tries to upload a 10MB file, but your server only allows 2MB, the PHP script will crash before it can send the email. This crash manifests as the contact form 7 red border error.
Step 1: Check Attachment Size
In your Contact Form settings, check the File tab (if you use file uploads). Ensure you have set a limit size limit, for example: limit:2mb.
Step 2: Increase PHP Limits
You can manually increase your server’s capacity by editing the wp-config.php file.
Access your site via FTP.
Edit
wp-config.php.Add this line:
define( 'WP_MEMORY_LIMIT', '256M' );
This ensures the server has enough RAM to process the email and attachment, preventing the crash that causes the contact form 7 red border error.
Method 5: Conflict Testing for Contact Form 7 Red Border Error
If methods 1 through 4 failed, you likely have a JavaScript conflict. Contact Form 7 relies on AJAX (a script that runs in the background) to submit the form without reloading the page. If another plugin breaks this script, the form fails.
Step 1: Check the Console
Right-click on your contact page and select Inspect.
Click the Console tab.
Click “Submit” on your form.
Look for red text in the console. If you see “500 Internal Server Error” or “JSON parse error,” a conflict exists.
Step 2: Deactivate Plugins
Go to Plugins.
Deactivate all plugins except Contact Form 7 and WP Mail SMTP.
Test the form.
If the contact form 7 red border error is gone, reactivate plugins one by one until it returns. The last plugin you activated is the culprit.
Conclusion on the Contact Form 7 Red Border Error
The red border is frustrating because it stops your business from receiving leads. However, it is almost always a sign that your server’s email delivery system is unconfigured or blocked.
By switching to a dedicated SMTP service (Method 1) and ensuring your “From” headers are valid (Method 3), you can solve 90% of these cases permanently.
Summary of Fixes:
SMTP: Install WP Mail SMTP to authenticate emails.
reCAPTCHA: Refresh v3 keys.
Headers: Ensure the “From” address matches your domain.
Limits: Increase memory for file uploads.
Conflicts: Check for JavaScript errors.
Still Stuck? If you have tried all 5 methods and still see the red error box, your hosting IP might be blacklisted. 👉 Contact Us Here for a professional email audit, or Order our Emergency Fix Service to get your contact forms working perfectly today.